DOCK BLOCKS ASSEMBLY
Please pick either the “Floating Platform Dock” or “Drive-On Boat Lift” tutorial video that fits your needs:
BASIC INSTRUCTIONS
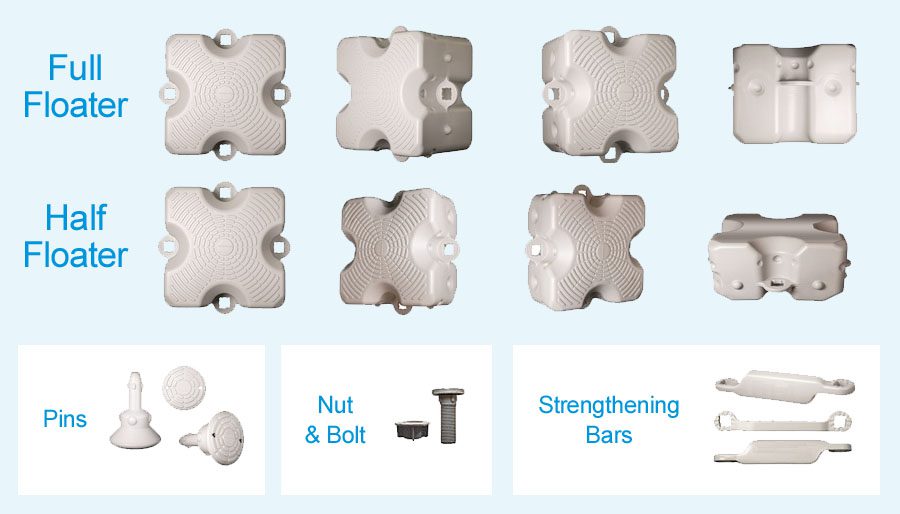
Here are pictures of the different Dock Blocks materials you will receive:
Along with a 1 1/8″ inch socket wrench, simply follow these 3 steps for floating docks:

It is typically a good idea to first create a sketch before laying out your blocks. Make sure logos are all facing the same direction and absolutely sure to tighten bung plugs.

Once you are certain all of the blocks are aligned properly, begin inserting connecting pins. The connecting pins have two holes at the top, which are used to tighten the pin. Rotate the top of the pinso that it is roughly 45 degrees to the block, and stomp it into the hole.

The outer edge of the unit is tied together with strengthening bars. Place the right end of the protective bar on top of the floater tongue. The left end of the protective bar then goes on the bottom of the tongue of the floater to the left.
Be sure every bolt is tight, every plug is in place, and that the assembly is securely fastened. Enjoy your docking system for years to come. Once you have assembled all of your blocks, just push your floating dock into the water. Walk or tow the assembly into position. Secure the assembly to dock, slip, or land using 1/2” braided nylon rope attached to 2 or more of the Dock Blocks strengthening bar bolts.